Deer Snack Stick Recipe
Looking for a high-protein snack that’s easy to make, nutritious, and packed with flavor? This venison snack stick recipe is your go-to solution for creating delicious meat sticks at home. Whether you’re into hunting or simply enjoy the rich, lean taste of deer meat, this recipe will guide you through every step to ensure that your deer sticks come out flavorful, tender, and perfect for any occasion. From snacks on a hike to game-day treats, these smoked snack sticks will keep you coming back for more.
Why make deer snack sticks at home?
Homemade deer sticks are not only cost-effective, but they allow you to control the ingredients, ensuring that you get the best possible meat-to-fat ratio, the perfect balance of spices, and the exact flavor profile you desire. You can make them with or without collagen casings, adding options like high temp cheddar cheese and liquid smoke for an extra burst of flavor. Best of all, this venison snack stick recipe is versatile enough to suit various dietary preferences, whether you like them mild, spicy, or a little bit smoky.
To explore other delicious and protein-packed recipes, be sure to check out our Snacks section, where you can find more great ideas for snacks and light meals.
Ingredients Overview for Your Deer Snack Sticks Recipe
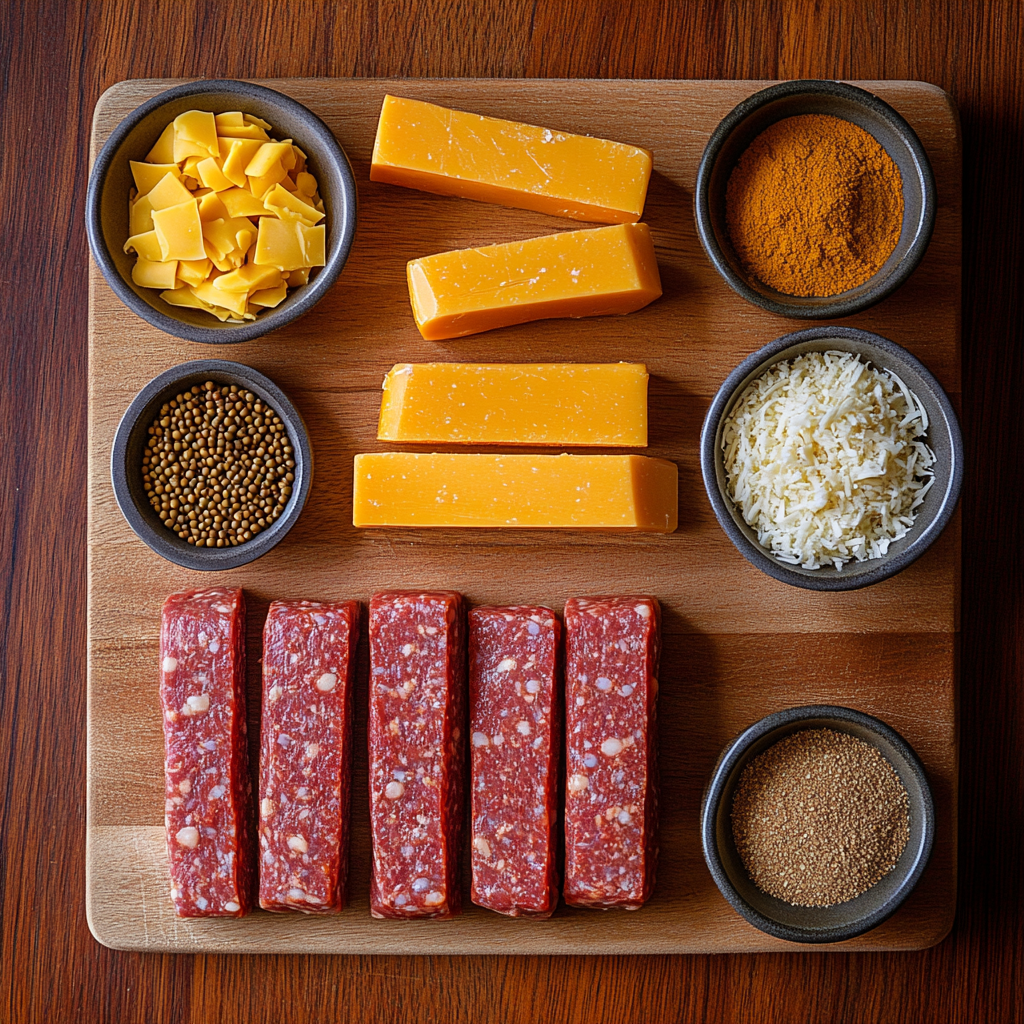
In any great snack sticks recipe, the ingredients make all the difference. These venison sticks use a blend of lean, ground venison mixed with a touch of added fat to create the ideal meat-to-fat ratio for flavorful, tender results. Each ingredient plays a crucial role in building the complex, savory flavor of the finished meat sticks, while also providing flexibility for personalization.
Main Ingredients:
- Ground venison – The core ingredient, known for its lean, gamey flavor. Venison is packed with protein, low in fat, and adds a unique, hearty taste to the sticks.
- High temp cheddar cheese (optional) – Adding small chunks of high-temperature cheddar cheese brings a delicious, creamy contrast to the lean venison. This type of cheese is designed to hold its shape even when cooked at high heat.
- Garlic powder – Essential for adding depth and a savory punch to the sticks.
- Salt – The key seasoning that enhances the natural flavors of the meat.
- Black pepper – Provides a mild spice that pairs perfectly with the richness of venison.
- Paprika – Adds both color and a slightly smoky flavor, ideal for balancing the rich meatiness of the venison.
- Mustard seeds – Gives a subtle tang and adds texture to the snack sticks.
- Curing salt (optional) – If you plan to store the sticks for an extended time, curing salt will help preserve them safely.
- Collagen casings – These casings are ideal for creating the classic shape of Slim Jims and other meat sticks while ensuring a satisfying snap when you bite into them.
- Red pepper flakes (optional) – For those who like a little kick, red pepper flakes will spice up the flavor profile.
- Liquid smoke – For a smoked snack stick flavor without the need for a smoker, liquid smoke gives you that rich, outdoorsy flavor right in your kitchen.
If you’re looking for substitutions, or if you’re on a gluten-free or dairy-free diet, don’t worry—this recipe can easily be adapted. You can leave out the high temp cheddar cheese or replace any seasonings with gluten-free alternatives. To find more recipes for snacks that are suitable for all dietary preferences, visit our Snacks section for inspiration!

Essential Tools for Crafting Perfect Venison Snack Sticks
Crafting the perfect venison snack stick recipe at home requires a few key kitchen tools. These tools ensure that you not only get consistent, high-quality results but also make the process easier and more efficient. Here’s a breakdown of what you’ll need and how you can substitute if you don’t have certain items on hand.
Must-Have Tools for Deer Snack Sticks:
- Meat grinder – If you’re starting with whole cuts of venison, a meat grinder is essential. A high-quality grinder allows you to control the texture of your ground venison and ensures that the meat to fat ratio is consistent. If you don’t own a meat grinder, many butcher shops will grind your venison for you.
- Mixing bowl – Use a large mixing bowl to thoroughly combine the ground venison with your spices, high temp cheddar cheese (if using), and other ingredients. Mixing the ingredients evenly is crucial for ensuring every bite of your venison sticks has the perfect balance of flavors.
- Sausage stuffer – When using collagen casings, a sausage stuffer makes it much easier to fill the casings evenly without air pockets. If you don’t have a sausage stuffer, you can use a piping bag or manually stuff the casings, though this process can be a bit more time-consuming.
- Dehydrator or oven – These snack sticks can be cooked slowly in a dehydrator or oven. If using an oven, set it to a low temperature (around 170°F) to dry out the sticks over several hours, or increase the temperature for a quicker cook if you’re in a hurry.
- Smoker (optional) – If you want an authentic smoky flavor, a smoker is a fantastic option for preparing smoked snack sticks. The slow, indirect heat from the smoker infuses the meat sticks with a rich, deep flavor that’s hard to beat.
- Meat thermometer – It’s critical to monitor the internal temperature of your snack sticks to ensure they’re cooked safely. The venison sticks should reach an internal temperature of at least 165°F (73°C) to be safe for consumption.
- Vacuum seal bags – Once your venison sticks are fully cooked and cooled, vacuum sealing them helps preserve their freshness. Properly sealed sticks can last in the fridge for up to a week or in the freezer for up to six months.
To explore more recipes that utilize similar tools, check out our Dinner section, where you’ll find dishes like grilled venison or smoked meats that also require a meat thermometer, smoker, and similar kitchen gadgets.
Step-by-Step Instructions for Your Deer Snack Stick Recipe
Now that you’ve gathered all your ingredients and tools, it’s time to walk through the process of making these delicious venison snack sticks step by step. Whether you’re new to making meat sticks or a seasoned pro, following these detailed instructions will help you achieve perfect results every time.
Step 1: Prepare and Grind the Venison
Start by preparing your ground venison. If you have whole cuts of venison, trim any fat, sinew, or silver skin from the meat to ensure a clean grind. Run the venison through your meat grinder using a coarse grind setting. Depending on your desired meat-to-fat ratio, you can mix in a small amount of ground beef or pork fat at this stage to add moisture and flavor. A ratio of 80% meat to 20% fat is ideal for achieving tender, juicy sticks.
Once ground, place the meat in a large mixing bowl and let it rest at room temperature for about 20 minutes. Allowing the meat to come to room temperature helps it absorb the spices more effectively during the mixing process.
Step 2: Mix the Ingredients
In a separate bowl, mix your dry spices, including garlic powder, salt, black pepper, mustard seeds, and paprika. If you want a spicy kick, add red pepper flakes or cayenne pepper. Pour the spices over the ground venison and mix the ingredients thoroughly. If you’re adding high temp cheddar cheese for a creamy, tangy burst, fold that in now, ensuring it’s evenly distributed throughout the meat mixture. If you’re using liquid smoke for that deep, smoky flavor, now is the time to add it.
At this stage, taste-test the seasoning. Fry a small portion of the meat mixture in a pan and adjust the spices if necessary before proceeding.
Step 3: Prepare the Collagen Casings
Soak your collagen casings in warm water for about 30 minutes. This step makes the casings more pliable and easier to work with. Once soaked, rinse them thoroughly to remove any residual salt. Attach the casings to your sausage stuffer and fill the hopper with the venison mixture. Slowly and evenly fill the casings, taking care not to overstuff them, as this can cause them to burst during cooking.
Step 4: Cook the Snack Sticks
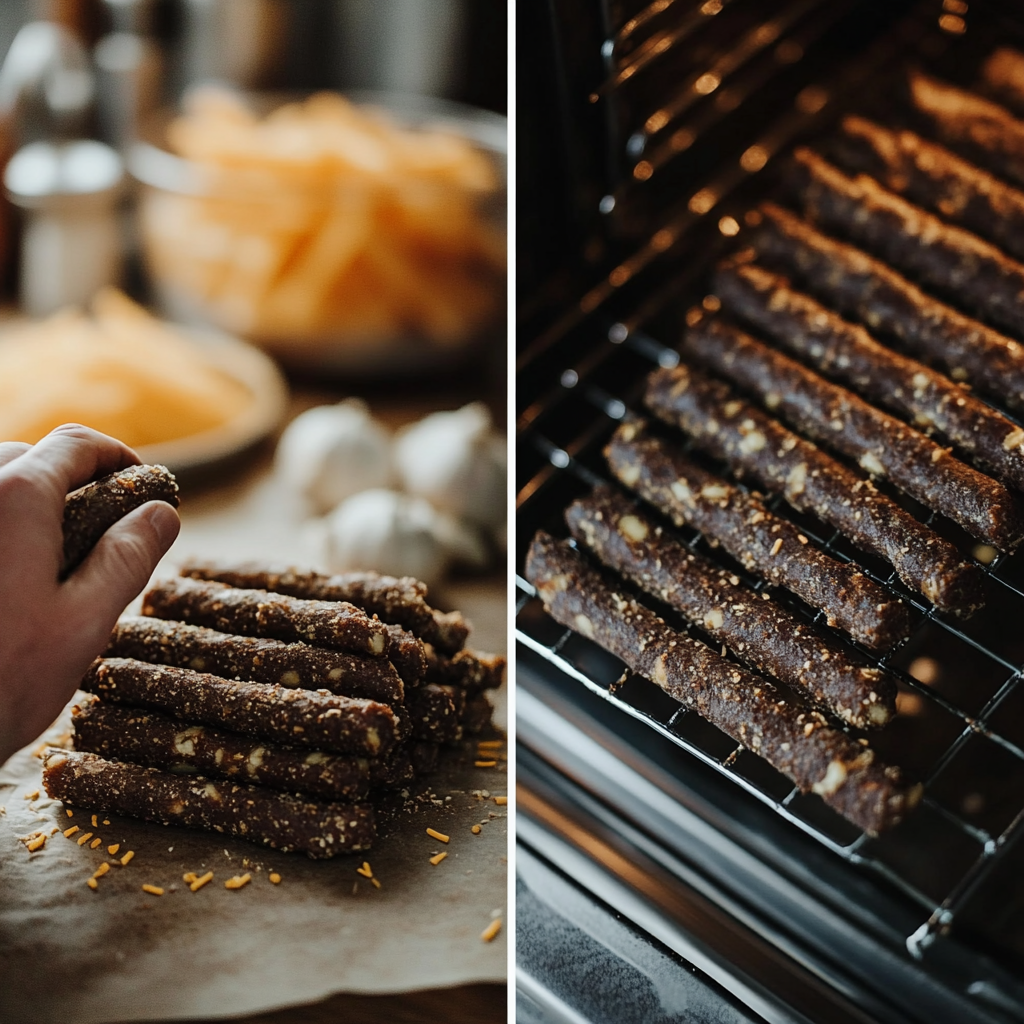
If you’re using an oven, preheat it to 170°F. Line a baking sheet with parchment paper and lay the filled casings or rolled meat logs in a single layer. For added flavor, you can also use a smoker and smoke the snack sticks at a low temperature for about 4 hours, allowing the sticks to absorb the rich, smoky aroma of the wood.
During cooking, make sure to turn the sticks occasionally for even drying. When using an oven, you can slightly increase the temperature to 180°F towards the end to finish the cooking process faster. Remember, the key is to reach an internal temperature of at least 165°F, which ensures the meat is fully cooked and safe to eat.
Step 5: Cool and Store
After cooking, transfer the venison snack sticks to an ice bath to stop the cooking process and help preserve the texture. Once cooled, pat the sticks dry with a paper towel. If you plan to eat them within a week, store them in the refrigerator. Otherwise, vacuum seal them and freeze for up to six months.
For more detailed guides on similar cooking methods, check out our Breakfast section, where you’ll find recipes that also involve slow cooking and low temperatures.

Flavor Variations and Customizations for Your Deer Snack Sticks
One of the best things about this venison snack stick recipe is its versatility. With a few minor tweaks, you can easily customize the flavor profile to suit your preferences. Whether you prefer sweet, spicy, or smoky, there’s a variation to satisfy every palate.
Sweet and Smoky Variation:
- Replace regular paprika with smoked paprika for a richer, deeper flavor.
- Add 1 tablespoon of brown sugar or honey to the spice mix for a sweet and savory balance.
- Use liquid smoke to amplify the smokiness if you’re not using a smoker.
This variation is ideal for those who enjoy a sweet and slightly charred flavor reminiscent of barbecue sauce.
Spicy Jalapeño Cheddar Variation:
- Dice fresh jalapeños and mix them into the ground venison for a burst of heat.
- Fold in high temp cheddar cheese for a creamy contrast to the spicy jalapeños.
- Add extra red pepper flakes or cayenne pepper if you want to dial up the heat even more.
This is a great option for those who love a fiery kick with their snack sticks, making them a bold alternative to traditional Slim Jims.
Low-Carb & Keto-Friendly Variation:
- Use all-natural seasonings with no added sugars.
- Skip the high temp cheddar cheese and opt for low-carb seasonings like ground mustard or garlic powder.
- Incorporate more fat into the meat mixture by adding pork fat, achieving a higher meat-to-fat ratio.
For more customized snack ideas, visit our Snacks section, where you’ll find a variety of recipes that cater to different flavor preferences and dietary needs.
Expert Tips for Perfect Venison Snack Sticks Every Time
Making deer snack sticks can be a fun and rewarding process, but there are a few tips and tricks to ensure you get the best results every time. Here are some expert tips to elevate your venison snack stick recipe and avoid common pitfalls.
Tip 1: Keep the Meat Cold
Always work with cold meat when mixing and stuffing your venison snack sticks. If the meat mixture gets too warm, it can become greasy, leading to uneven cooking and a less desirable texture. Keep the ground venison and any added fat chilled throughout the process.
Tip 2: Don’t Overstuff the Collagen Casings
When filling the casings, be mindful not to overstuff them. If they’re too full, they might burst during cooking, resulting in uneven or dried-out sticks. The goal is to fill the casings firmly but with a bit of give.
Tip 3: Ensure Proper Cooking Temperature
To achieve perfectly cooked snack sticks, it’s important to maintain a low and steady heat during the cooking process. If using an oven, check the temperature regularly and avoid the temptation to increase the temperature too quickly. The sticks should reach an internal temperature of at least 165°F to ensure they’re safe to eat.
Tip 4: Store Them Properly
For the best results, vacuum seal your venison snack sticks after they’re cooked and cooled. This helps preserve their freshness, allowing you to enjoy them for months if stored in the freezer. If vacuum sealing isn’t an option, tightly wrap them in plastic wrap and store in an airtight container.
Looking for more expert tips on making meat sticks and other wild game recipes? Head over to our Dinner section for in-depth guides on cooking with venison and other game meats.
Nutritional Benefits of Venison Snack Sticks
Venison snack sticks are not only delicious, but they’re also a healthier alternative to store-bought meat sticks or Slim Jims. Here’s a look at the nutritional benefits you can expect from this venison snack stick recipe:
- High in Protein: Venison is packed with protein, which makes these snack sticks a great option for fueling your day. Each stick contains approximately 12-15 grams of protein.
- Low in Fat: Venison is naturally lean, making it a lower-fat alternative to beef or pork-based sticks. By controlling the meat-to-fat ratio, you can create a healthy, low-fat snack.
- Rich in Vitamins and Minerals: Venison is an excellent source of essential vitamins and minerals such as iron, zinc, and vitamin B12, all of which contribute to maintaining good health.
- Gluten-Free Options: By using gluten-free seasonings and collagen casings, you can create gluten-free venison sticks perfect for those with dietary restrictions.
For a more in-depth look at the nutritional profile of venison and its health benefits, check out I a trusted nutritional information site I where you can find all the details on venison’s impact on health.
Serving Suggestions: Perfect Pairings for Venison Snack Sticks
While venison snack sticks are delicious on their own, they can also be enjoyed with a variety of side dishes and snacks to create a more filling meal. Here are a few ideas for serving them:
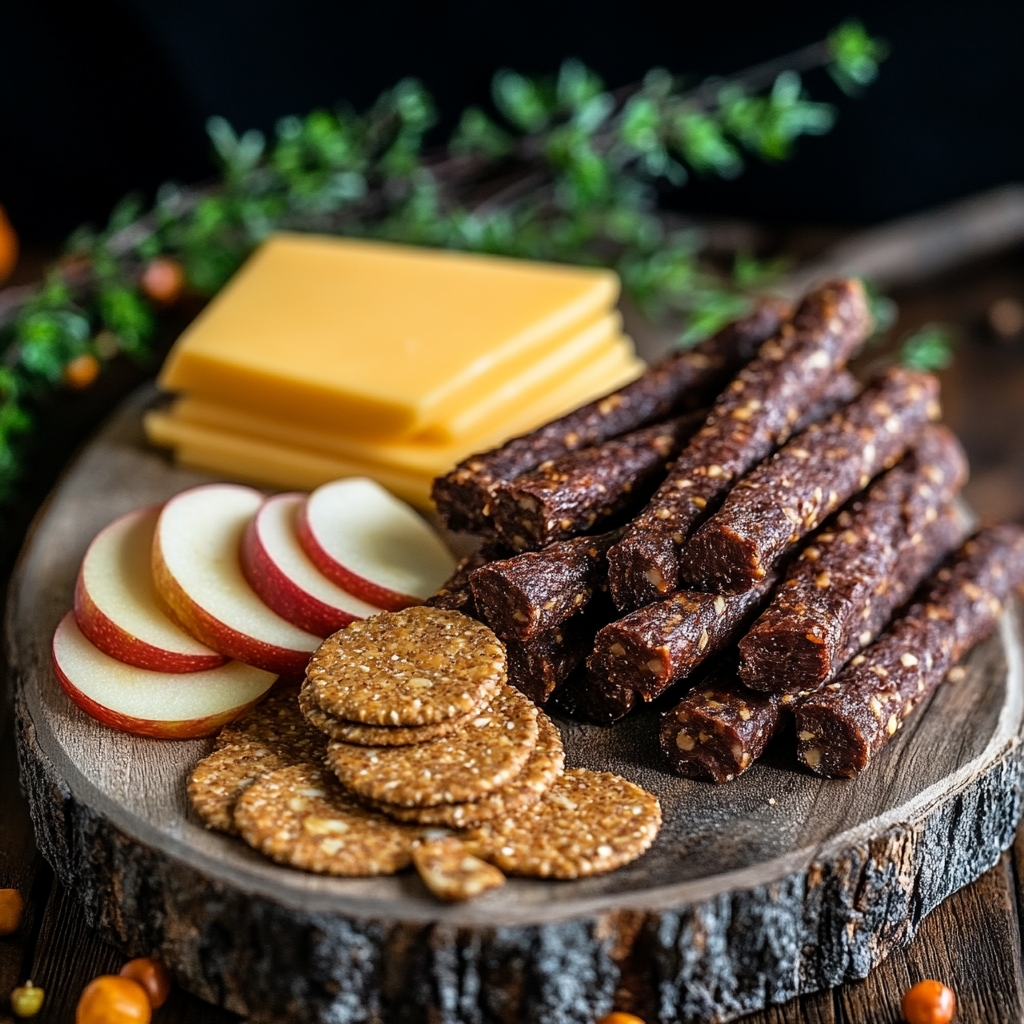
- With Cheese and Crackers: Pair your venison snack sticks with sharp cheddar or gouda cheese and whole-grain crackers for a balanced, protein-packed snack.
- Alongside Fresh Fruit: For a lighter option, serve your deer snack sticks with fresh fruit like apple slices or grapes. The sweetness of the fruit complements the savory, smoky flavors of the sticks.
- As a Snack Platter: Include your venison sticks on a charcuterie board alongside other cured meats, pickles, and dips for an elevated snack experience.
For more serving ideas, explore our Dinner section, where we offer pairing suggestions for other hearty, meat-based dishes.

Storage Tips for Keeping Your Deer Sticks Fresh
Venison snack sticks can be stored in several ways to ensure their freshness and longevity. Here are some tips for proper storage:
Refrigerator Storage:
Once cooled, store the sticks in an airtight container or vacuum seal them. They’ll keep fresh in the refrigerator for up to a week.
Freezer Storage:
For long-term storage, vacuum seal the sticks and place them in the freezer. Properly sealed, they can last up to six months. When you’re ready to eat them, simply thaw in the refrigerator and reheat in the oven at a low temperature, or enjoy them cold for a convenient snack.
Ice Bath for Preservation:
After cooking, placing the sticks in an ice bath immediately helps stop the cooking process and firms up the texture, ensuring they stay moist and flavorful.
For more information on how to store and preserve homemade snacks, check out our Snacks section for additional tips.
FAQs: Common Questions About Deer Snack Sticks
Can I use a different type of meat for this recipe?
Yes, you can substitute venison with other meats such as beef, turkey, or a blend of pork and beef. However, keep in mind that using lean meats like venison will result in a lower-fat, healthier snack. Adjust the meat-to-fat ratio accordingly.
How do I make these snack sticks gluten-free?
To make gluten-free venison sticks, ensure that all your spices and seasonings are labeled as gluten-free. Additionally, use collagen casings that are free from gluten.
Can I make this recipe without a sausage stuffer?
Yes! If you don’t have a sausage stuffer, you can still make meat sticks by shaping the meat mixture into thin logs and baking them directly on a parchment-lined baking sheet.
For more answers to your cooking questions, head over to our Breakfast section, where we cover frequently asked questions about similar recipes and cooking methods.
Conclusion: Why This Venison Snack Stick Recipe Should Be Your Next Go-To
Venison snack sticks are a versatile, healthy, and satisfying option for anyone looking to try something new in their snacking routine. With just a few simple ingredients and some essential tools, you can create homemade meat sticks that are packed with flavor, low in fat, and perfect for sharing or enjoying on the go. Whether you’re using a sausage stuffer and collagen casings for traditional slim-jim style sticks or rolling the meat mixture by hand, this venison snack stick recipe is adaptable, easy to follow, and delicious.
Looking for more inspiration on how to prepare wild game meats or want more snack ideas? Visit our Snacks section for a variety of recipes, or explore this trusted food blog for additional wild game cooking tips and ideas.
